|
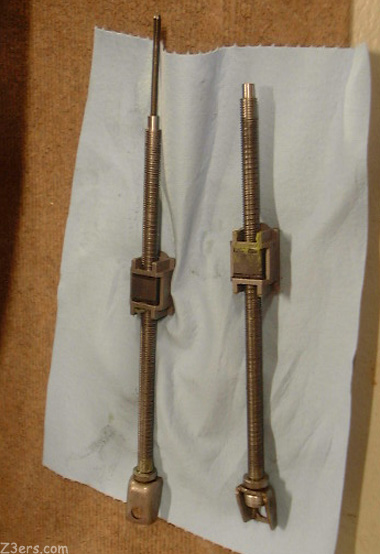
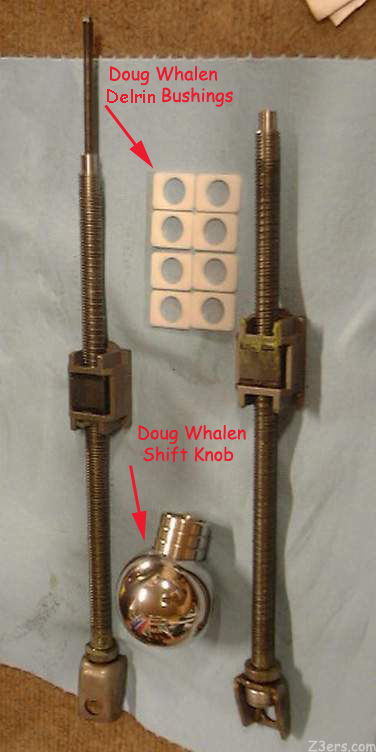
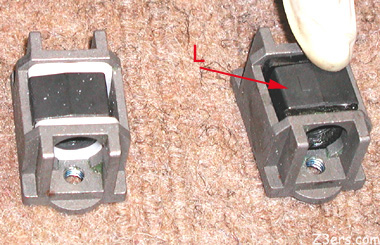
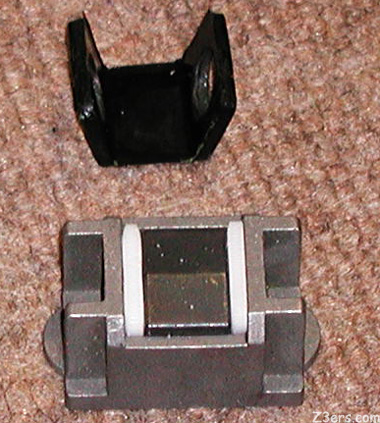
Disclaimer None of us are professional car service technicians and this story is just my own experience, no responsibility implied, mess with your electrical system and your own BMW warranty at your own risk. Props given to ReeYee and Skin Mechanic and Hugo for their seat bushing instructions, and most especially to Doug Whalen for making these sanity-saving bushings and shift knobs and other goodies! Seat Rocking Shish Kebab Clutch Stop Remove the Hump Check Under Seat Wires Removing the door sills Removing the Seats Mac Console Lid New Cam Cover Sport Seats Custom Leather Console Lid Shift Knob Removal Thanks to JonT for company and pics and Shawn for all the work and the pics and the company BBQ and to Melissa for company and dinner and turning me on to her iBook and Brent for the prototype shot (Whalen Shift Knob) So your seat is rockin' and it's driving you crazy. This is not the rocking chair kind of rockin' there is another problem like that in our seats with another kind of fix. This is the feeling like your seat is sliding a little bit when you come to a stop, like a roller coaster loose on the rail. It may have been like that from the start in your car, it might have begun after some use, it might be a roadster or a coupŘ it might be an ///M or a Z3, doesn't matter year or model. Well the good news is that there is a fix, the bad news is that it's a bit annoying getting to the part you need to fix. Behold the elusive kebab: 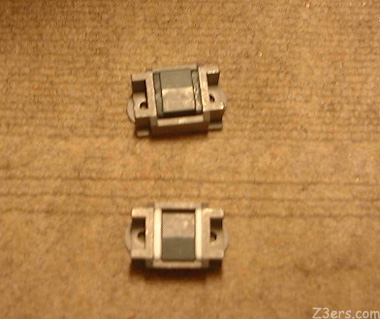 Deceptively simple. On top you see a kebab with original oem black bushings, on the bottom you see one with Doug Whalen's white kevlar bushings. That is what it is all about, replacing the oem black rubber bushings with hard white bushings that wont "give". I didn't think this would work because the rocking in my seats was so bad you could see it move, it felt like an inch of play. This is it. I checked my copy of BMW's Parts and Service Information CDs, albeit not the most recent, they don't show this part. The closest I could come was 52 10 000 Removing and Installing front seat (normal/electric) left or right(Z3 Roadster M Roadster Z3 CoupŘ M CoupŘ)
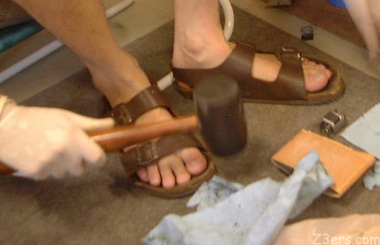
Here is the PARTS NEEDED list I can manage- please email me to update it or add proper names Materials needed: Vaccuum cleaner (when you see what's under your seat, you will want one, and maybe some nice carpet cleaning stuff too) Socket Wrench -13 and 16mm socket for the seat rails. Then a couple of different sized torx bits to disassemble the rails. Don't recall the exact size there. 100 grit sandpaper sanding block- so you can sand more evenly on the bushings. What size lug wrench Block of wood to keepseat up 12V power supply to move seat rails when it is out of the car Knee protection Soldering iron- you may find torn wires Nut and bolt tray Blue Tape to mark where kebab is on rails Work gloves- plastic and knit- for pulling door sills grease? for shishs? mirror tool to see under the seats 4 whalen bushings per seat BFH (Rubber Hammer) Midget 3/8" Drive Ratchet ~~~~~~~~~~~~~ First you have to remove the seat from the car. This pretty well follows the BMW directions for Seat Removal We're at Shawn Fogg's magic garage, so you are seeing pics of the same process for Shawn's gorgeous Bright Red 96 1.9 with standard seats with seat heaters, and my wonderful Boston Green 97 2.8 with brand-new sport seats. ~*~Important to note that we only worked on the driver's seat. PLEASE check the BMW service information for special procedures relating to working on the passenger seat AIRBAG~*~ Also note that extensive use of the 12v power supply is used, I don't know how to move the rails for this procedure without it. Shawn suggests you make sure you remove the seats when the seats are fully in the most rear position. Shawn begins by removing the bolts in the front of the rails and on the rear of the rails.(4 bolts, 2 in front and 2 in rear) (clipped for Doug) Here is shown the rods from Shawn's 1.9 standard seats. One is obviously larger than the other. Not so with the sport seat rods, which look alike. Sorry, no photo of the sport seat rods..
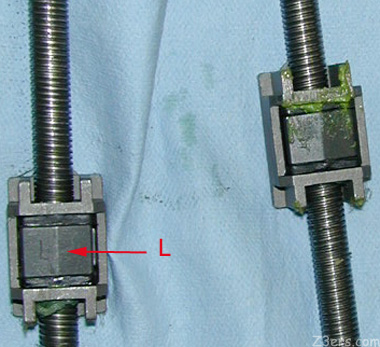
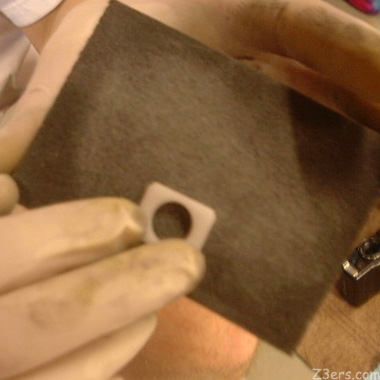
You have to sand down the bushings, made of kevlar, to fit tight in the metal piece with the kebab.
|
||||||||||
|
|
||||||||||
 Esmerelda's Pages ~ Z3ers.com Esmerelda's Home Page
|
