|
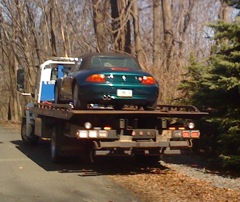
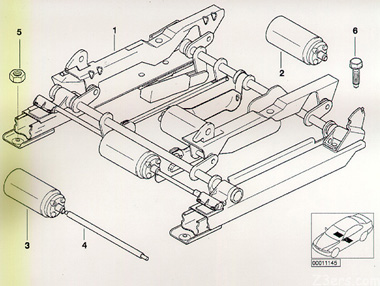
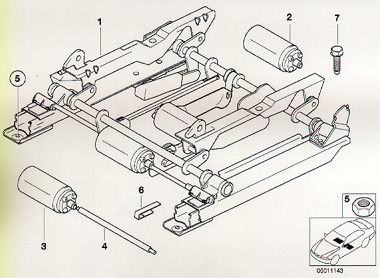
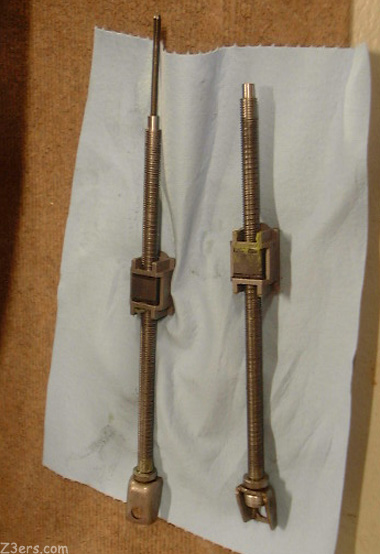
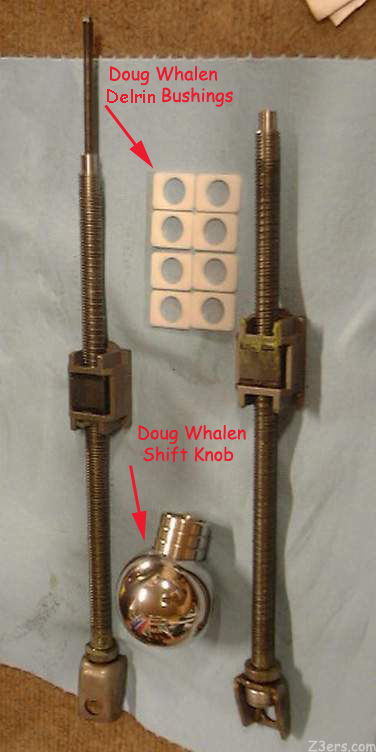
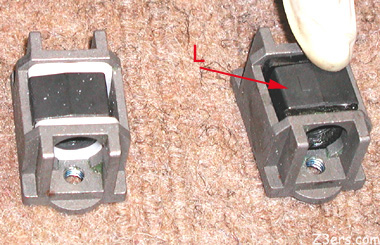
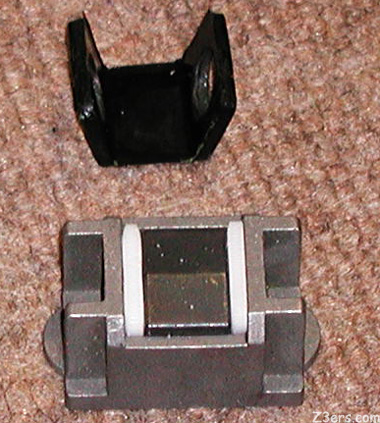
Disclaimer None of us are professional car service technicians and this story is just my own experience, no responsibility implied, mess with your electrical system and your own BMW warranty at your own risk. Props given to ReeYee and Skin Mechanic and Hugo for their seat bushing instructions, and most especially to Doug Whalen for making these sanity-saving bushings and other goodies! Seat Rocking Shish Kebab Clutch Stop Remove the Hump Check Under Seat Wires Removing the door sills Removing the Seats Mac Console Lid New Cam Cover Sport Seats Custom Leather Console Lid Shift Knob Removal Thanks to JonT for company and pics and Shawn for all the work and the pics and the company BBQ and to Melissa for company and dinner and turning me on to her iBook and Brent for the prototype shot and Beth for finding the Shish Kebab pic So your seat is rockin' and it's driving you crazy. This is not the rocking chair kind of rockin' there is another problem like that in our seats with another kind of fix. This is the feeling like your seat is sliding a little bit when you come to a stop, like a roller coaster loose on the rail. It may have been like that from the start in your car, it might have begun after some use, it might be a roadster or a coupŘ it might be an ///M or a Z3, doesn't matter year or model. Well the good news is that there is a fix, the bad news is that it's a bit annoying getting to the part you need to fix. Behold the elusive kebab: 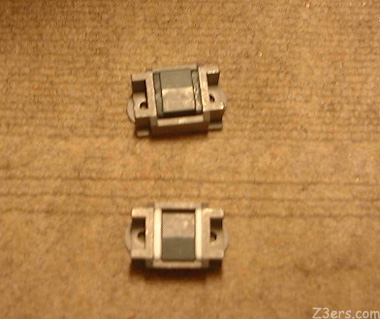 Deceptively simple. On top you see a kebab with original oem black bushings, on the bottom you see one with Doug Whalen's white Delrin bushings. That is what it is all about, replacing the oem black rubber bushings with hard white bushings that wont "give". I didn't think this would work because the rocking in my seats was so bad you could see it move, it felt like an inch of play. This is it. I checked my copy of BMW's Parts and Service Information CDs, albeit not the most recent, they don't show this part. The closest I could come was 52 10 000 Removing and Installing front seat (normal/electric) left or right(Z3 Roadster M Roadster Z3 CoupŘ M CoupŘ)
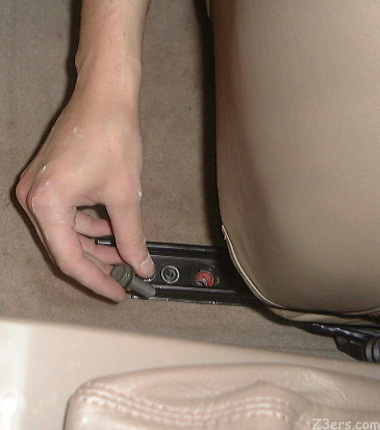
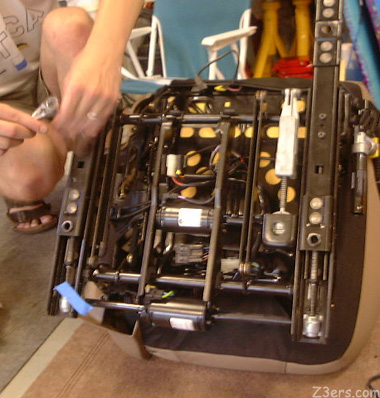
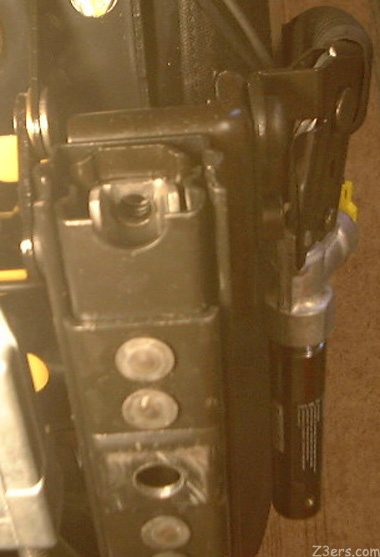
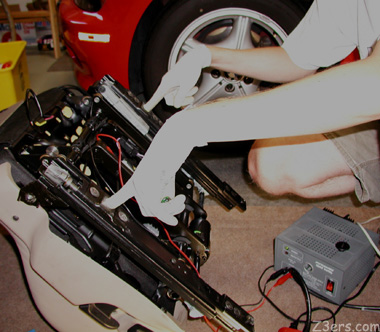
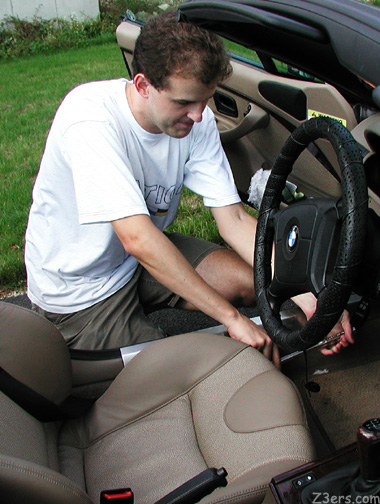
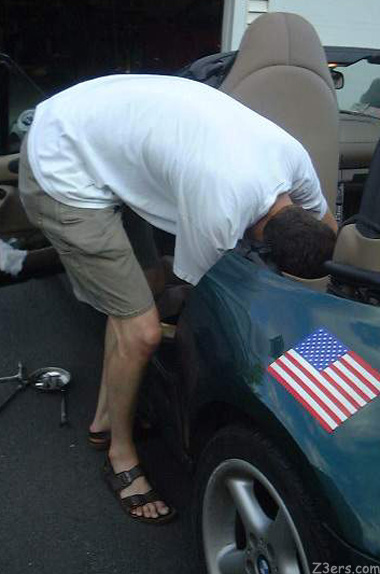
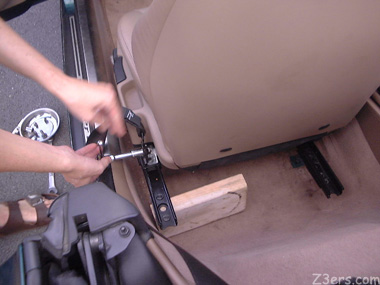
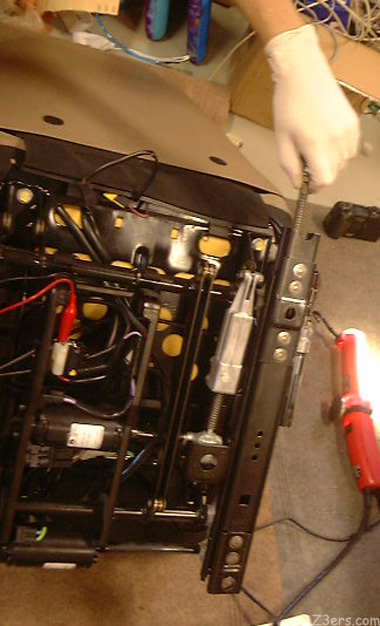
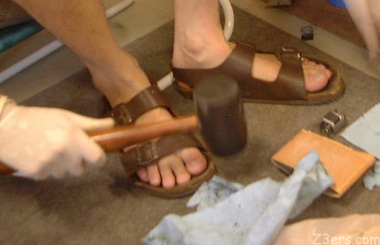
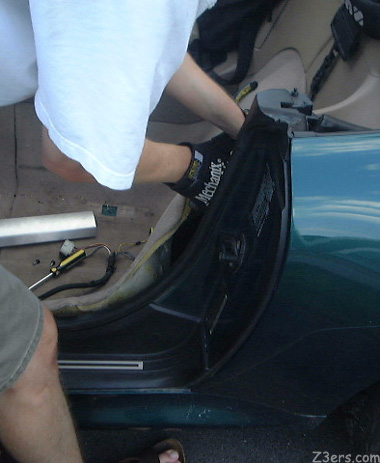
Here is the PARTS NEEDED list I can manage- please email me to update it or add proper names Materials needed: Vaccuum cleaner (when you see what's under your seat, you will want one, and maybe some nice carpet cleaning stuff too) Socket Wrench -13 and 16mm socket for the seat rails. Then a couple of different sized torx bits to disassemble the rails. Don't recall the exact size there. 100 grit sandpaper sanding block- so you can sand more evenly on the bushings. What size lug wrench Block of wood to keepseat up 12V power supply to move seat rails when it is out of the car Knee protection Soldering iron- you may find torn wires Nut and bolt tray Blue Tape to mark where kebab is on rails Work gloves- plastic and knit- for pulling door sills grease? for shishs? mirror tool to see under the seats 4 whalen bushings per seat BFH (Rubber Hammer) Midget 3/8" Drive Ratchet ~~~~~~~~~~~~~ First you have to remove the seat from the car. This pretty well follows the BMW directions for Seat Removal We're at Shawn Fogg's magic garage, so you are seeing pics of the same process for Shawn's gorgeous Bright Red 96 1.9 with standard seats with seat heaters, and my wonderful Boston Green 97 2.8 with brand-new sport seats. ~*~Important to note that we only worked on the driver's seat. PLEASE check the BMW service information for special procedures relating to working on the passenger seat AIRBAG~*~ Also note that extensive use of the 12v power supply is used, I don't know how to move the rails for this procedure without it. Shawn suggests you make sure you remove the seats when the seats are fully in the most rear position. Shawn begins by removing the bolts in the front of the rails and on the rear of the rails.(4 bolts, 2 in front and 2 in rear) 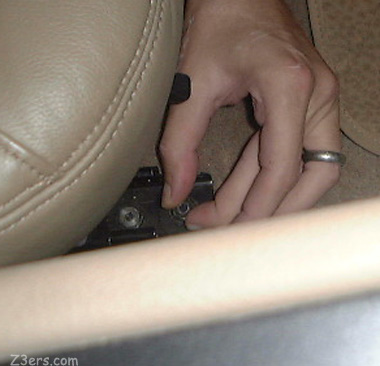 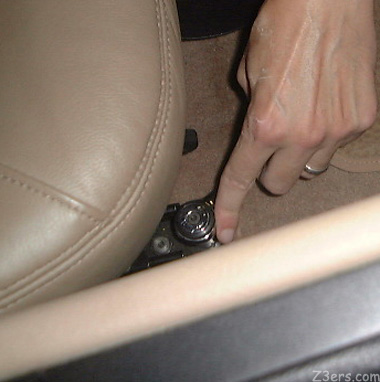
 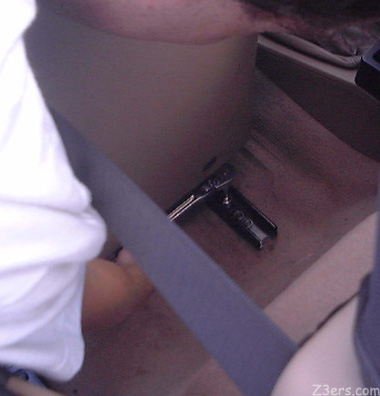
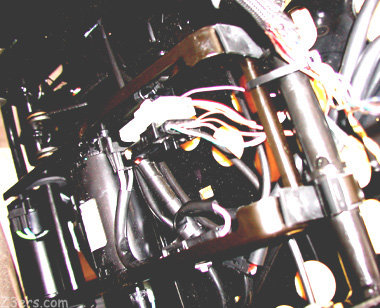
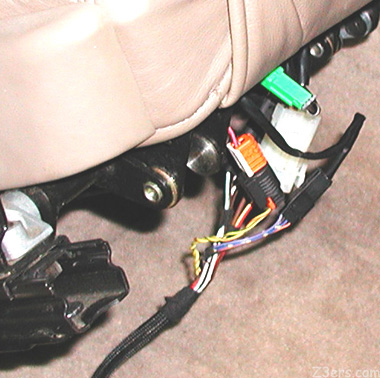
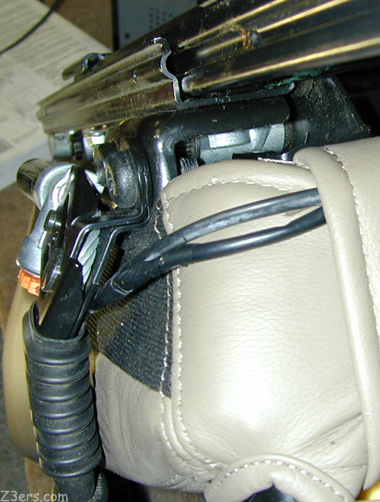
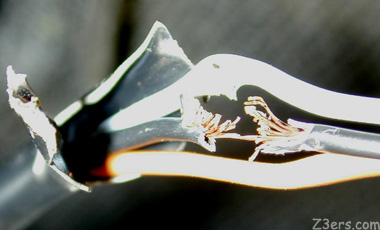 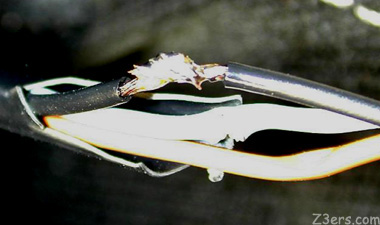 The placement of these wires under the seats is really unfortunate. Shawn repairs the wire and finds a better way to route the wires, tucked under the clip for the seatcover, wrapped around the side to the seat belt, well out of the way of the moving parts under the seat. 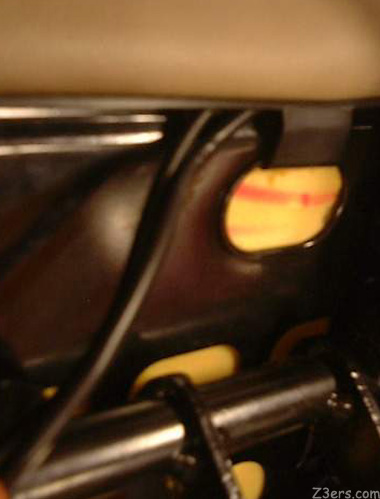 
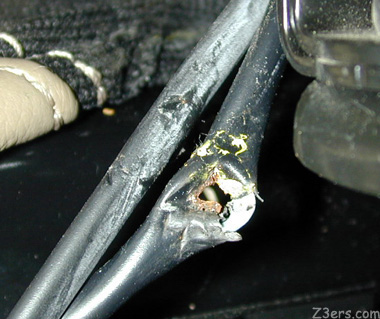
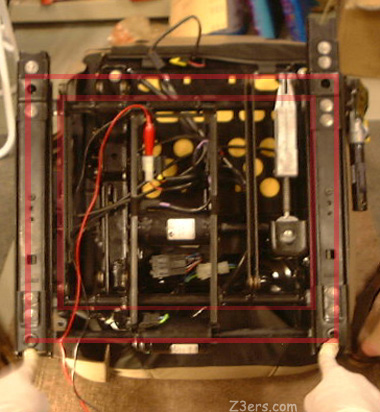
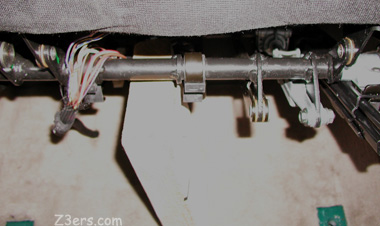
**be careful to note which skewer comes from which pontoon***. 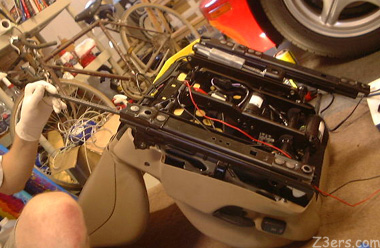 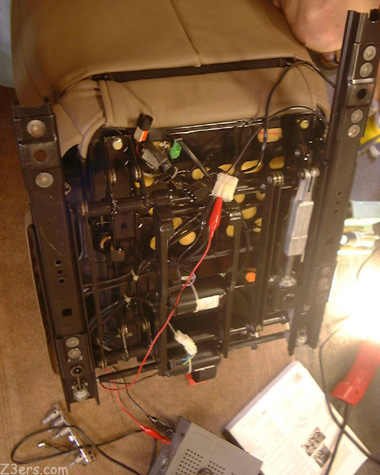
Here is shown the rods from Shawn's 1.9 standard seats. One is obviously larger than the other. Not so with the sport seat rods, which look alike. Sorry, no photo of the sport seat rods..
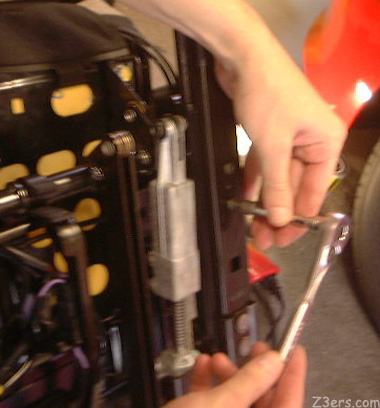
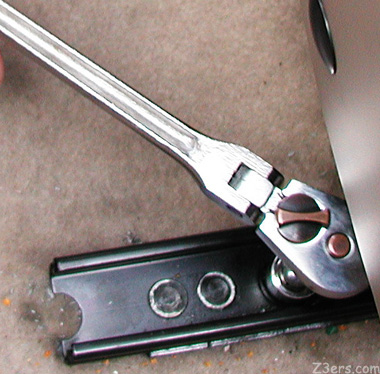
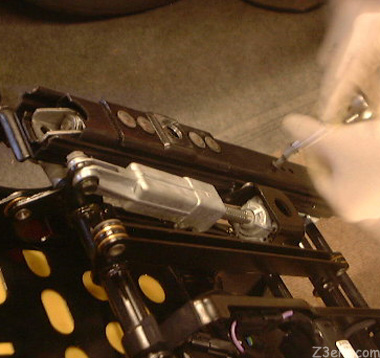
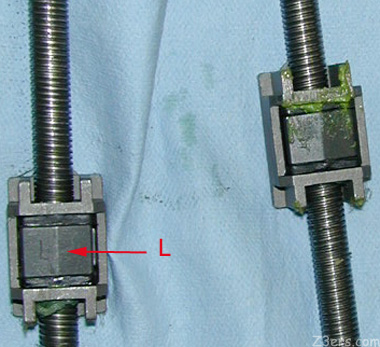
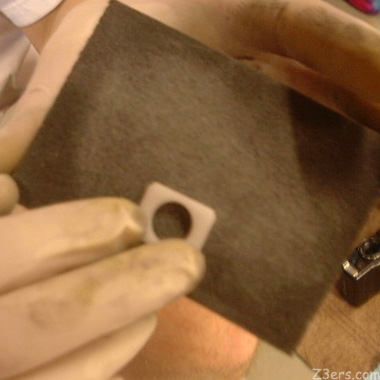
You have to sand down the bushings, made of Delrin, to fit tight in the metal piece with the kebab.
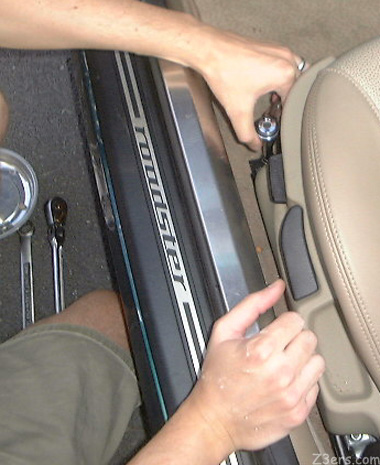
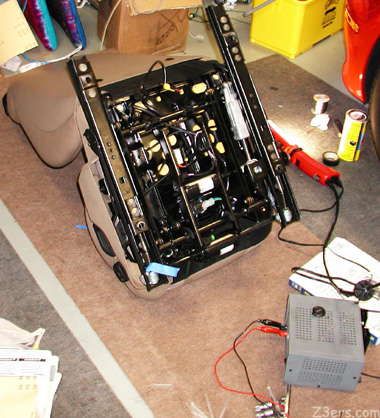
While the seat is out, it's a nice time to remove the HUMP. The hump is a piece of foam that keeps the shape of the carpet on the wall behind the seat. Russell reports an increase of space of 1/4 inch for putting the seat back (leg room only) from removing the decorative foam. 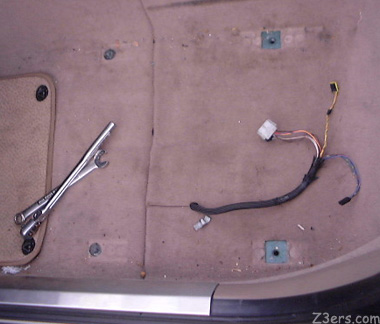 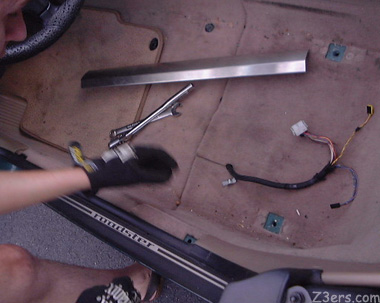 The tools you see are the ones Shawn was using to remove the seat. He dons work gloves to remove the door sill. You grab the piece about 6 inches in on each side. Then you have to just do one quick/hard yank and it will come right off. Don't be timid about it or you won't get it off. Pulling straight up, releasing three plastic grips. It never works that way when I try it or when JonT tries it or when Dave T tries it, but when Shawn does it... ba da bing. After getting that piece up before you can pull the carpet out there are two screws that need to be removed. Then it just pulls right out. 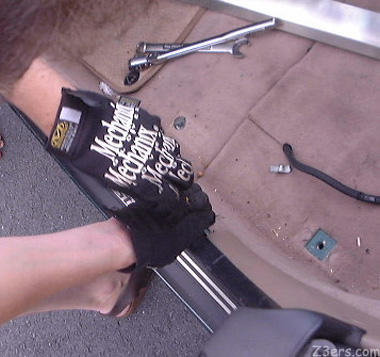 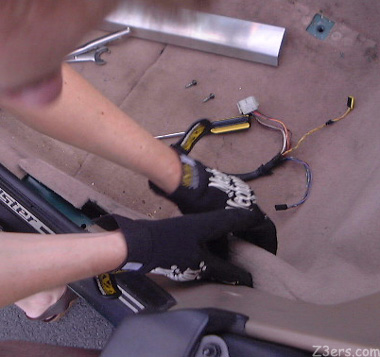 Shawn pulls the carpeting gently from the floor and up the side 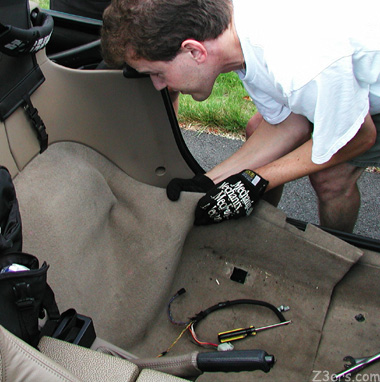 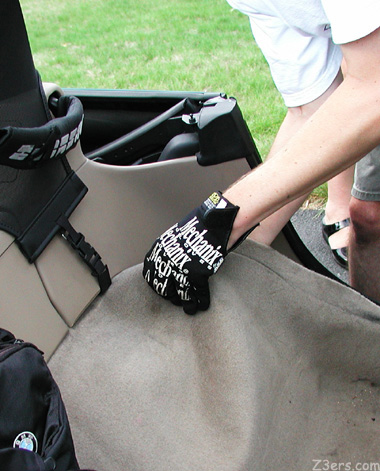
-------------------------------------------------------------------------------- Just for kicks, what is under the floor carpet 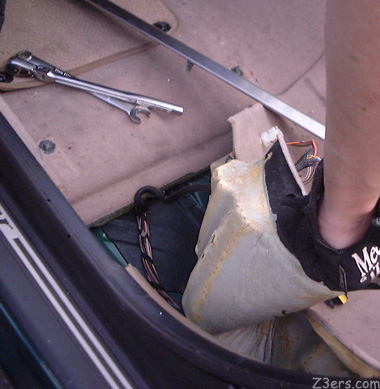 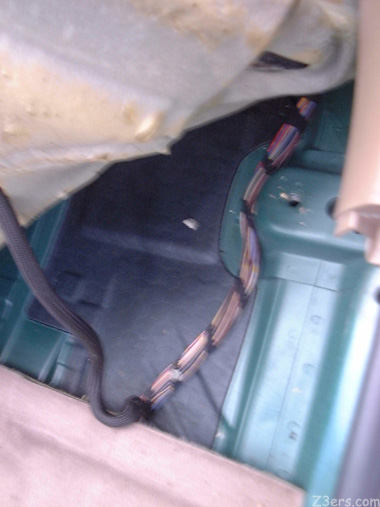
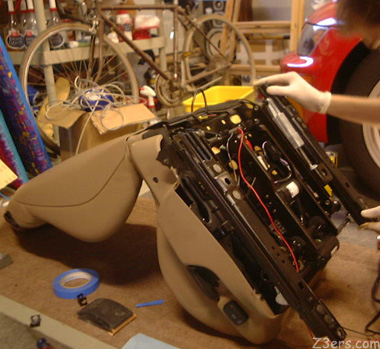
----------------------------------------------------------------------------------- Return of the Shish The reassembled shish kebab is put back into the pontoon. 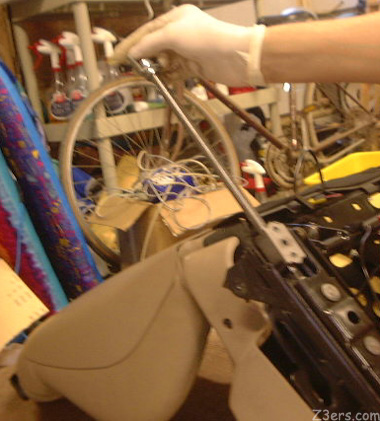 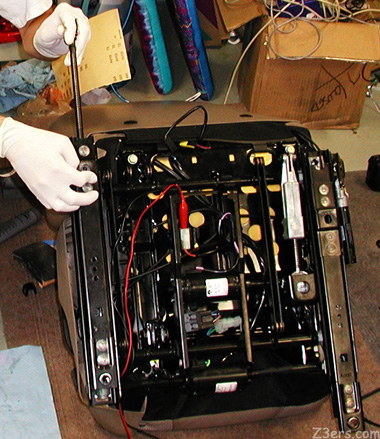
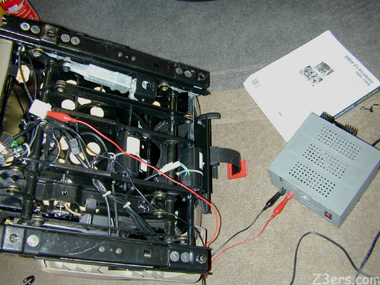
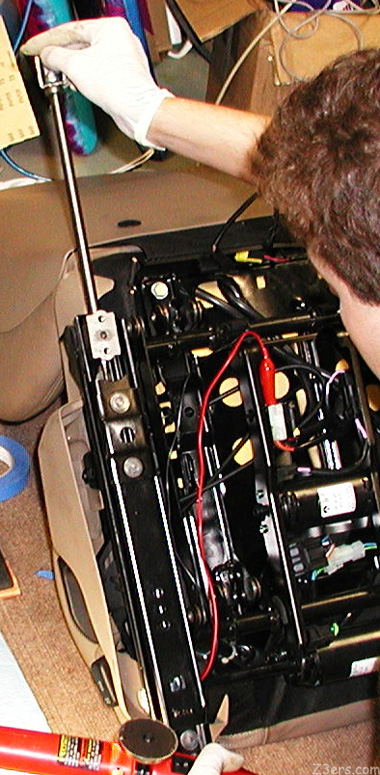
Watch the video to see how the long pointy part of the shish bends as it turns into the motor: Seat Rail Motor Operation ~1.5 MGs 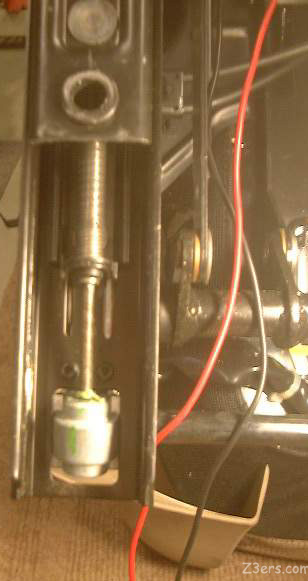 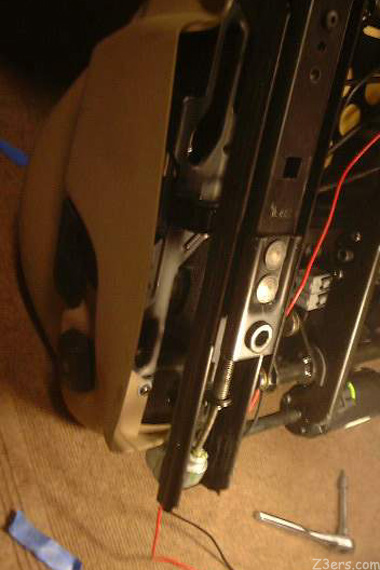
 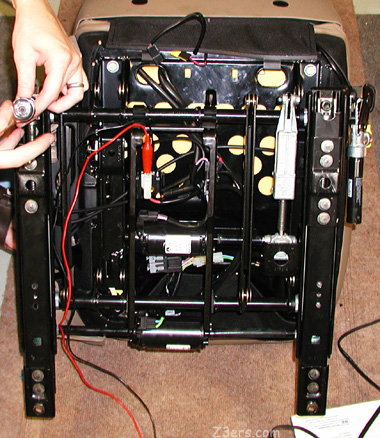
 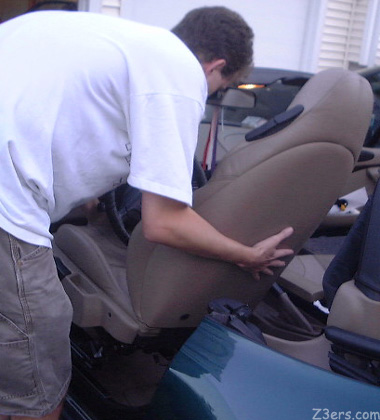 Shawn puts Emmy's Seat In (Video) Subtitle: Why this is harder in a coupŘ. 1 MG Quicktime Reconnecting the seat heater and seat power wires under the seat. 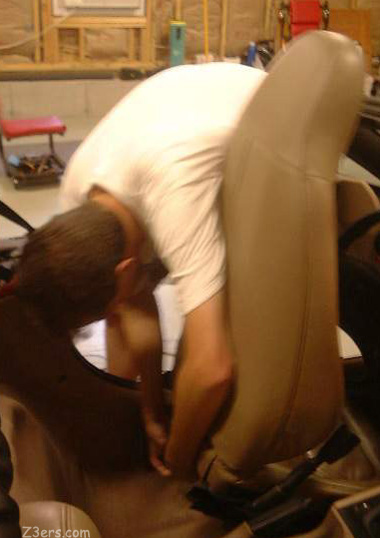 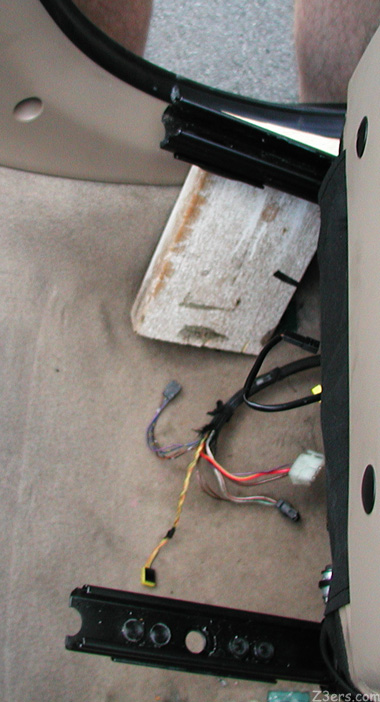
OK this is just plain uncomfortable any way you look at it. Finished Project: Shawn's Seat and Emmy's Seat 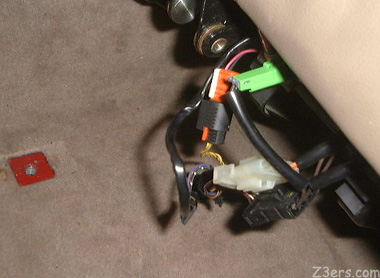

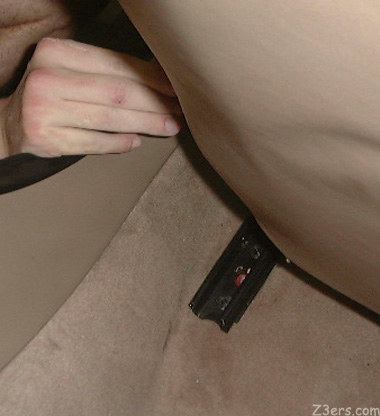
 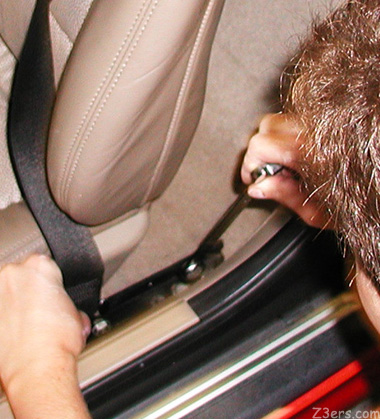 Replace seat belt and the 4 bolts. 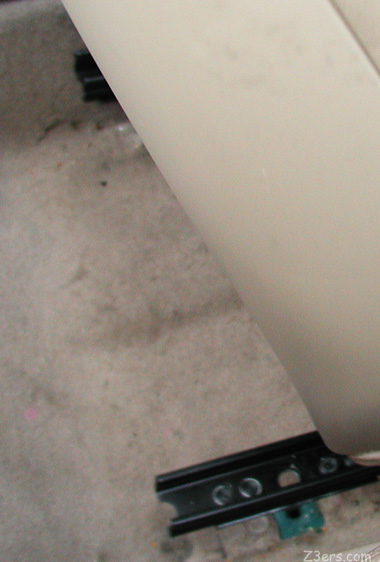 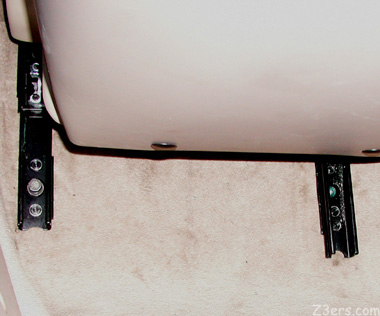
  *Make sure to test your seat heaters and seat movement* As long as you have your head in the footwell...What a great excuse to install a Ron Stygar clutch stop. Actually, any excuse is a good one to install a clutch stop. A no brainer. Apparently the last couple inches of the clutch throw is just pointless. Unscrewing the existing clutch stop- which I think just protects your carpet from being hit- and replacing it with a stop with a longer screw. The bolt and washer you reverse from shipping, the washer goes against the carpet, the nut holds the stop at the spot  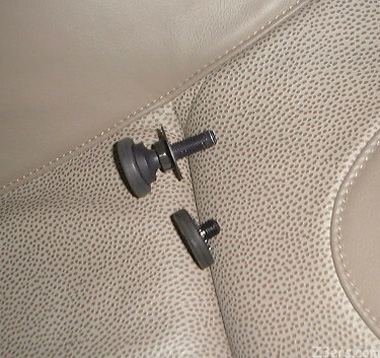
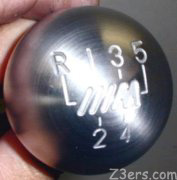
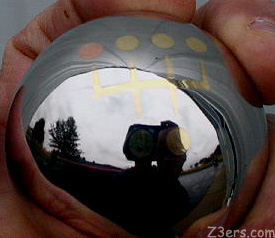
Shawn writes: For clutch stop adjustment you basically screw it down as far as it will go. Then start the engine. Put the car in gear with the handbrake on and your foot firmly on the brake pedal. Slowly bring the clutch up till the rpms begin to drop from the clutch engaging. Turn off the engine. Unscrew the stop to raise it up to a little below where the clutch begins to engage. Test this several times with the engine running and it usually takes a few tries to get it right. I like to keep my stop a few turns below the friction point. When you get it where you like it tighten down the set nut. Then take it for a spin and get everything warmed up as the friction point might change slightly and you may need to screw the clutchstop down a little more. If after you install a clutch stop shifting into first and second gear isn't as smooth as it was screw the clutchstop down further. 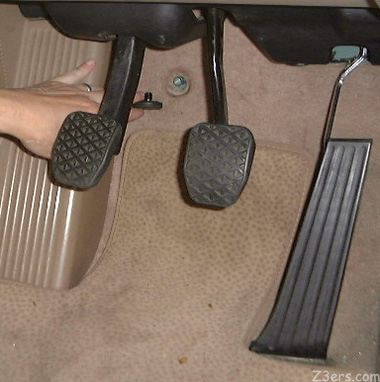 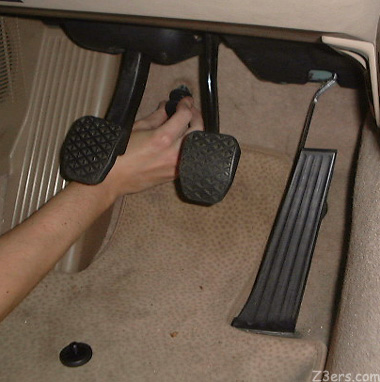  Well gee. Now it is so much easier to be lazy when shifting. I can press the clutch to the floor in traffic and not be pointing my toe. Very very nice and simple. "Hey Rach, wanna try a Doug Whalen Shift Knob?" Uh, well, uhm, I heard about all these people who have problems getting their shift knobs off--... huh? That's it? You took it off? 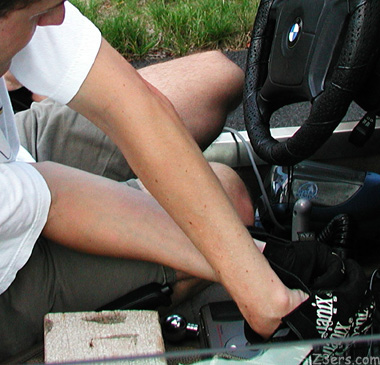  Shawn writes: To get the shift knob off without giving yourself a black eye you put the drivers seat back as far as you can go. Put the clutch in (handbrake on obviously) and reach over with your left hand and grasp the shift knob upside down so your thumb is closer to the bottom of the shifter. Now with your right hand do the same thing again with your hand upside down. Again here you want to just give it one quick pull and it will come right off. You want to sort of sit in the seat and twist your body a little toward the shifter. Just pull up hard with a quick jerk. Just like the door rocker panel you want to commit to it. DO NOT TWIST THE SHIFT KNOB. When it pops free your hands should naturally move to the left of your face without wacking yourself. Kudos to Ron Stygar for this removal method. To put the knob back on you basically just place it on the shift lever itself and gently rotate it till you feel the tab in the knob lock into the groove in the shift rod. Then just give it a light pound with your hand and it should pop into place. 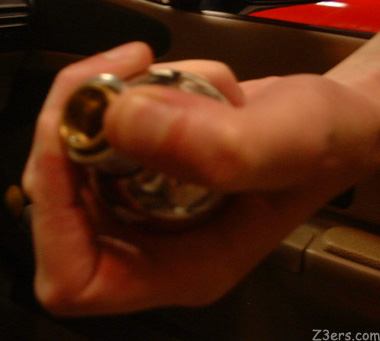  Using a Doug Whalen Shift Knob is so easy. Pull the collar back and pop it on. Pull the collar back and pull it off. No sweat. The feeling of the crafted metal ball is very pleasant, the stick is shortened for an easier shorter throw. These pics taken in JonT's car, sorry about the lighting, he doesn't really have fluorescent wood grain.  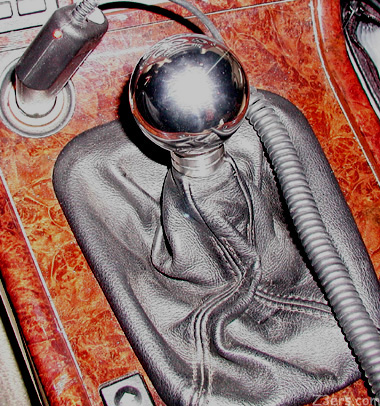 Jon and I got to try the feel of the shorter, heavier, rounder shift knob in each of our cars for a couple runs. As you can see, the Whalen Shift Knob sits lower on the shaft, which should please anyone with long arms. Changing the height of the shifter enters into the realm of short shifters, a topic I understand superficially. As I understand it, the only short shifter that really works for Z3s is made by Ron Stygar. One clear advantage of the short shifter is less travel to get into each gear. For that point alone, a Whalen Shift Knob would do the same. The Whalen Shift Knob is also substantially heavier than the oem knob. One source lists the weight of the oem knob at 3 ounces- (I haven't weighed mine) and suggests that any knob weighing more than double the oem weight would cause "wear of the gear or shifter rail"- just like leaving your hand on the shifter would. That brings up the whole "hand on the shifter" debate. I was taught to drive without leaving my hand on the shifter, it does seem to be common sense to me, as I can feel the shifter tremble slightly and assume it would rather move freely than to have resistance in any form. On the other hand, I have lots of friends who drive always with their hand on the shifter, and not only have I never heard of them having a problem, I haven't ever read of anyone anywhere in any car ever having a problem caused by leaving their hand on their shifter. It could be equally argued that the vibrations I allow the shifter to experience are causing wear. Where is there a definitive guide of allowable weights on the BMW shifter that has empirical data available for review or even BMW engineering to back it up? I did find one knowledgeable source that quoted allowable weights, but that article did not reveal the data used to support their conclusions, and that site was selling competitive products to reduce "notchiness" -ostensibly from their own brand of short shifters. Their suggestion was to use a heavier stick for the shifter, or a shift knob that was double the weight of the oem shifter- both of which they will happily sell to you. In my view, without the data to support the conclusion that 6 ounces is the maximum allowable weight tolerance, or a reason to believe that it matters to the gear or shifter rail if the additional weight comes from the stick or from the knob- it's very hard to find firm ground to stand on the subject. One thing I would like to see, is the good folks at LeatherZ.com coming up with some sort of convenient and attractive leather cover for the shift knob on sunny days. Call it a "Knobidom". ;)
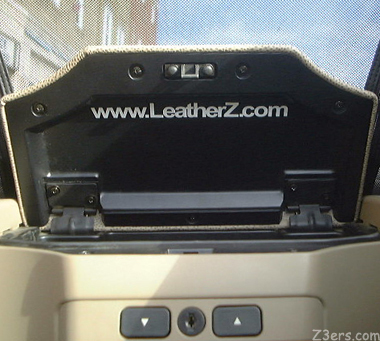
 Emmy sits in the driveway with Saffy, JonT's car peeking out from behind her. Both cars are waiting for the chance to grab a couple hundred miles of road on the way home. Emmy is a very happy car now. I am unbelieveably relieved. The seat rocking was so annoying. The clutch stop is a blessing. I even have a little more room to back my seat up. Can't leave the garage without looking under the hood of Shawn's gorgeous 1.9. Someday there will be a Downing Atlanta Supercharger for the 6 cylinder. Until that day, this is a close as I am going to get. And what's this? A tease for the next little Fogg DIY.... Fancy cam covers... 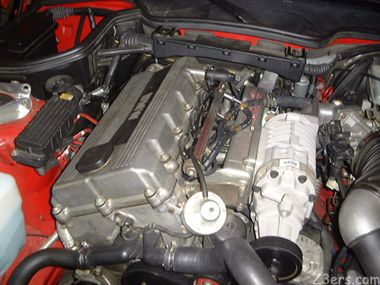 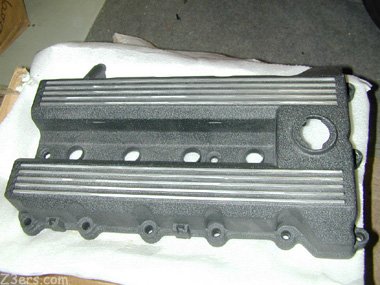 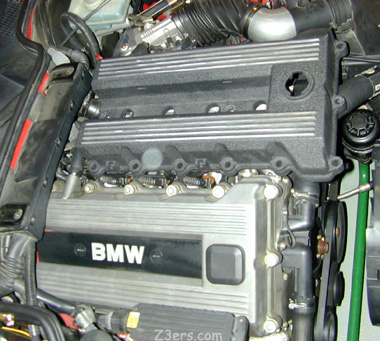 Stay tuned.... Last but not least... the one and only beige "dot" leather console lid. I have been trying to buy the leather for this project for about 3 years now, as well as hunting for beige dot leather sport seats. Funny, I used to think they were ugly. Blame Nathan Fong for changing my mind on the Dragon. At the beginning of this year I discovered that not only had they discontinued production of the heretofore unappealing beige dot leather but also there were only 2 of the seats left for the driver's side! Time to hurry up, belly up and pay retail. Russell Schmoyer of Daniels BMW carefuly cuts the part numbers off the new sport seat boxes for me to keep. For the record, they are: 52-10-9-070-635 and 6 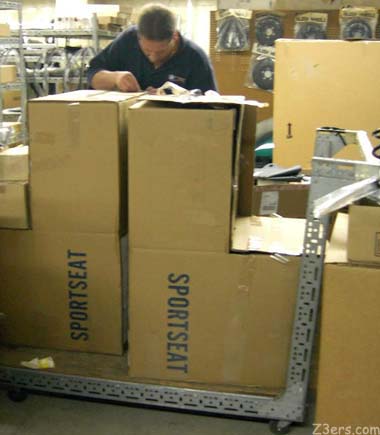 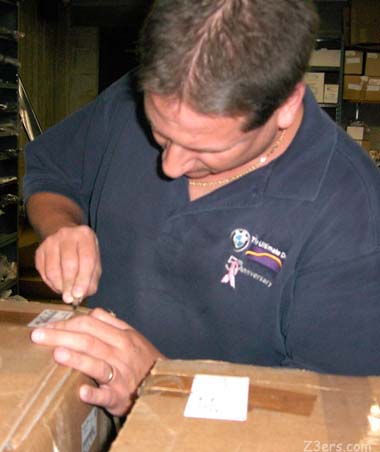 A quick peak in the box, yep, that's it. Wonder who got the other one? 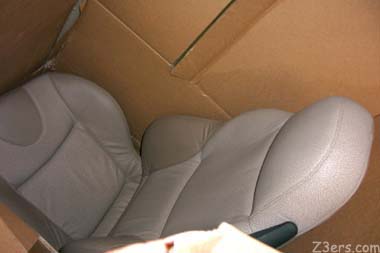
It could have been a major hassle to install for my favorite BMW technician- Frank Nehrer at Daniels BMW. 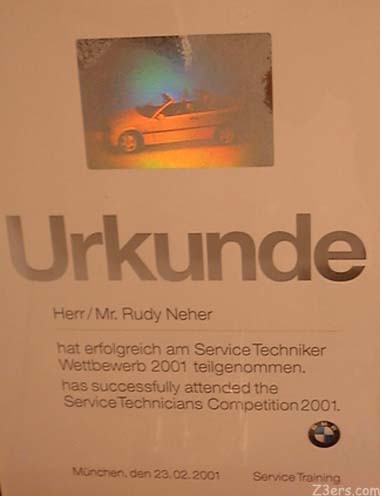 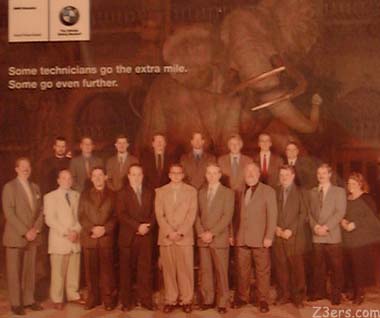 Frank is back from competing representing the US in the BMW Technicians Olympics in Munich in February. Here is Frank with all the competitors... and an elephant.... Frank is wearing a suit and tie! I will surely pay for this later My car seats are standard, no heat. Prepared to wire the whole car, Frank was delighted to find the wiring pre-stashed in Emmy, just waiting for him to find it. So I have my old standard seats- and all that rare dot leather. And so me and Frank ripped the leather seatcover off the foam on the passenger seat. 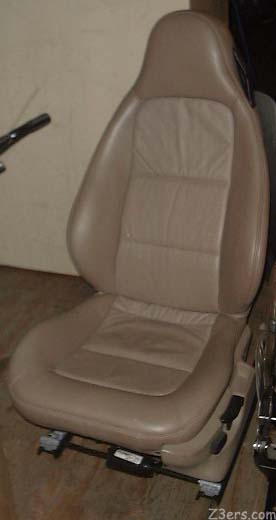 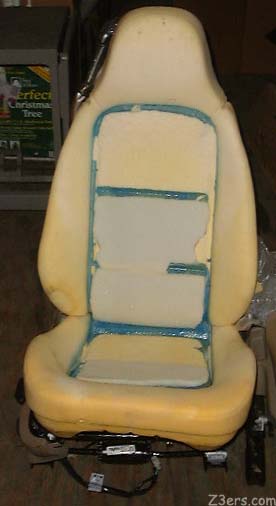 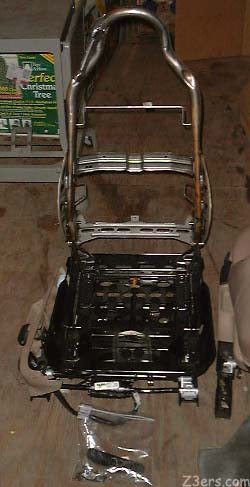 I sent the molted skin from my old passenger seats to the Leather Gods of LeatherZ.com along with a new console lid, and begged Jon and Andy to make a beige dotted purse from a sow's ear. And so they did:
 And so Ladies and Gentlemen of Z3Land.... With that I have reinvented the interior of my car with the help of my Z3 buddies... Man does that car feel good now. |
||||||||||||||||||||||||
|
|
||||||||||||||||||||||||
 Esmerelda's Pages ~ Z3ers.com Esmerelda's Home Page
|

